
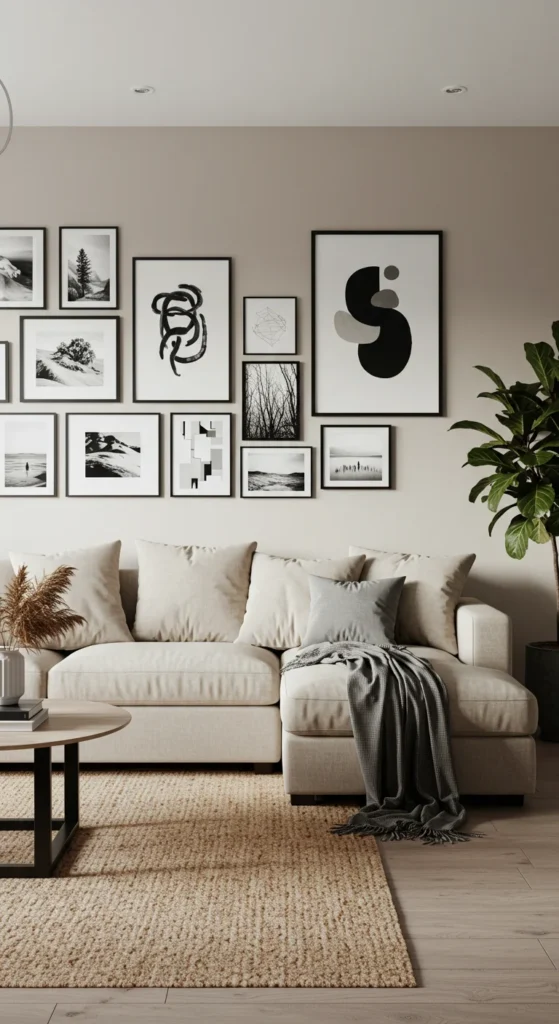
A gallery wall is one of the easiest ways to add personality and style to your home. Whether you want to display family photos, art prints, or travel souvenirs, the right layout can turn a blank wall into a striking focal point.
This guide walks you through five simple steps to create a gallery wall that looks cohesive, intentional, and effortlessly chic.
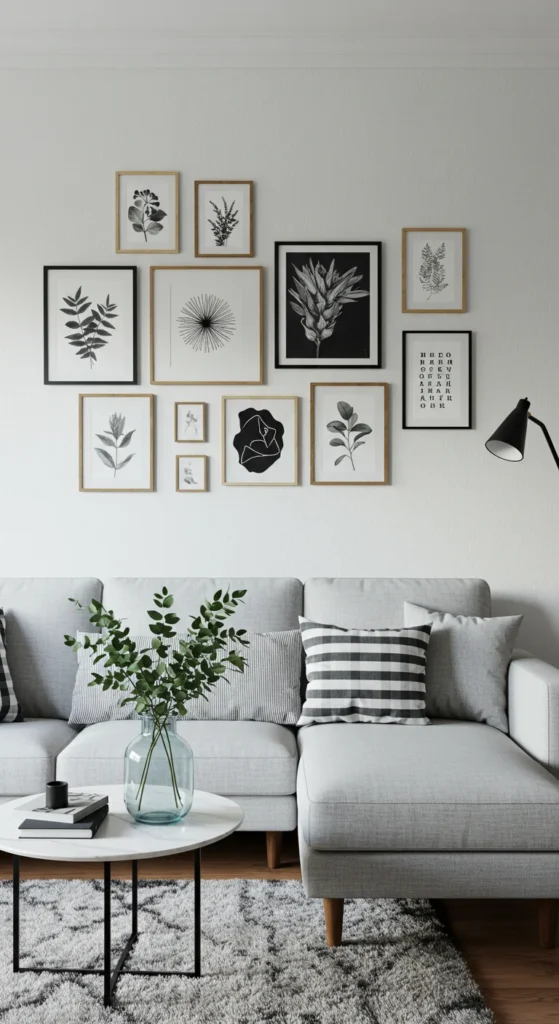
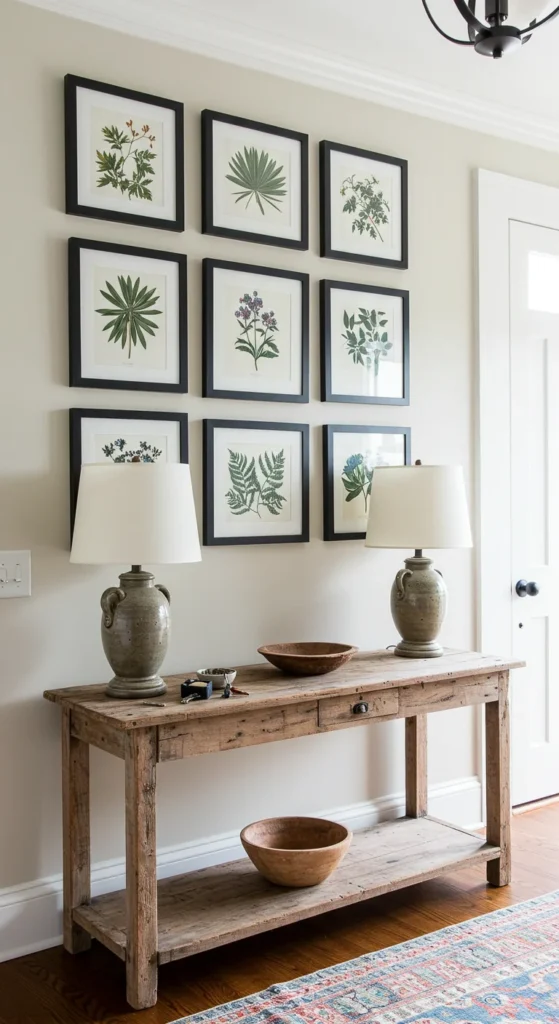
Step 1: Choose Your Wall & Theme
Start by picking the wall you want to highlight—this could be behind a sofa, in a hallway, or even above a staircase.
- Decide on a theme to keep your gallery cohesive, like black-and-white photos, abstract art, or nature prints.
- Stick to a color scheme for frames and artwork so the wall feels unified.
- Consider the size of the wall to determine how many pieces you’ll need—larger walls can handle more frames, while smaller walls benefit from fewer, bigger pieces.
Step 2: Collect & Prepare Your Artwork
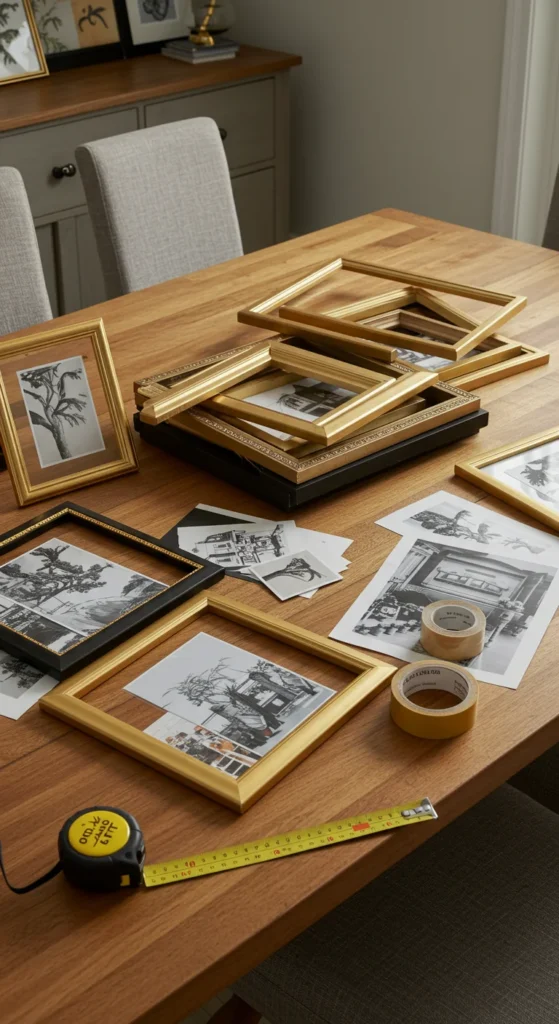
Gather the pieces you want to display before you start hanging anything.
- Mix different frame sizes and shapes to make your wall visually interesting.
- Include a combination of art prints, family photos, or even small mirrors.
- If you’re on a budget, print high-resolution images at a local print shop and use thrifted frames painted in one matching color.
Step 3: Plan Your Layout on the Floor
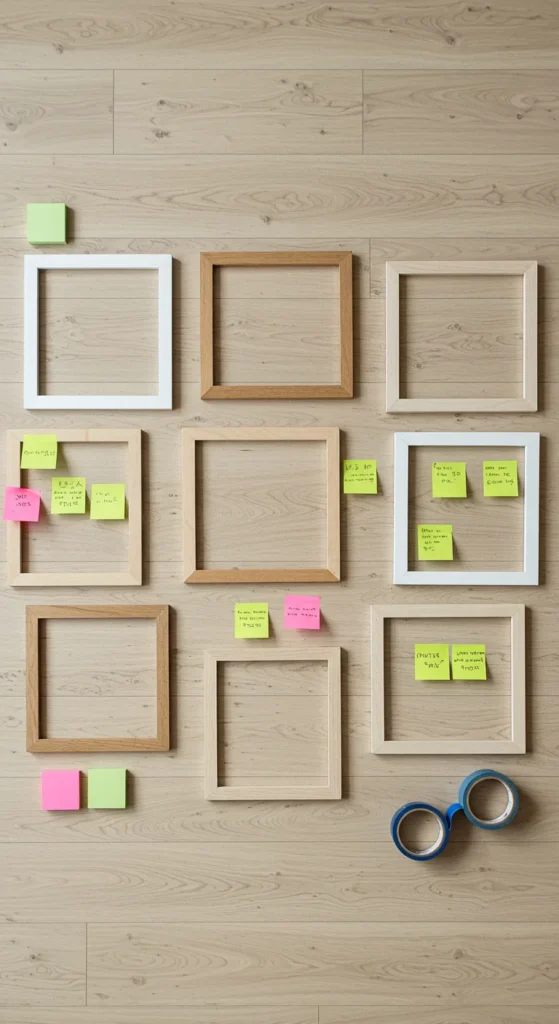
Lay all your frames out on the floor to see how they look together before putting nails in the wall.
- Start with the largest piece as the focal point, then build around it with medium and small pieces.
- Aim for consistent spacing—about 2 to 3 inches between each frame—for a clean finish.
- Take a photo of the layout for reference when you start hanging them up.
Step 4: Mark & Hang Your Frames
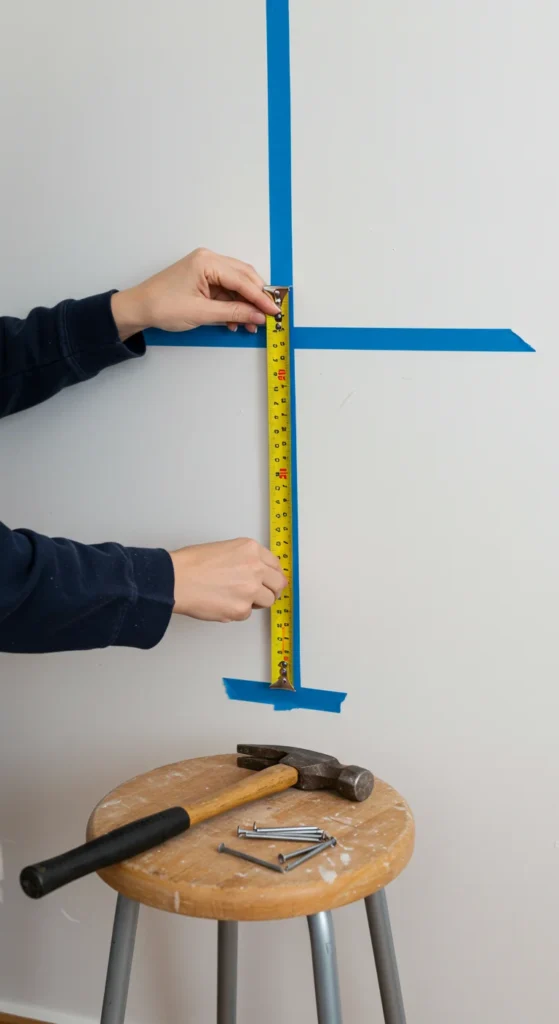
Before hammering nails, mark the wall to avoid mistakes.
- Use painter’s tape to outline the shape and spacing of your gallery wall.
- Mark the nail spots with a pencil for precise hanging.
- Double-check that everything is level using a small bubble level or a smartphone app.
Once you’re satisfied, start hanging from the center outward to keep your layout balanced.
Step 5: Add Finishing Touches
The final touches make your gallery wall feel polished and intentional.
- Step back and look at the entire wall—adjust any frames that feel out of place.
- Add subtle decor beneath the gallery, like a console table, a plant, or a lamp, to ground the display.
- Keep nearby surfaces clutter-free so the gallery remains the star of the space.
Takeaway
Creating a stunning gallery wall doesn’t require a professional—it’s all about planning your layout, sticking to a theme, and taking your time with spacing. By following these five steps, you can easily transform any blank wall into a curated feature that reflects your personality and makes your space feel more inviting.
Save these tips for your next weekend project and watch your gallery wall become your favorite corner at home!
Leave a Reply