
Wall molding is one of the quickest ways to elevate any room. With just a few trims, clean lines, and thoughtful placement, you can turn a plain wall into a stunning architectural feature that feels timeless and sophisticated. The best part? You don’t need a full renovation—just creativity, planning, and a little DIY confidence.
Ready to add instant elegance to your space? Let’s get into the details.
Understand the Style You Want
Before buying any trim, decide what kind of molding style fits your home. There are many options, and knowing your direction beforehand keeps the room cohesive.
Popular molding styles:
- Board and Batten: Clean, modern, and great for entryways or dining spaces.
- Picture Frame Molding: Classic rectangular panels that instantly elevate walls.
- Wainscoting: Lower-half molding for a traditional, formal look.
- Chair Rail: A single horizontal trim that divides the wall visually.
- Crown Molding: Adds elegance where the wall meets the ceiling.
Each style creates a different vibe, so pick the one that aligns with your home’s personality—modern, traditional, transitional, or vintage chic.
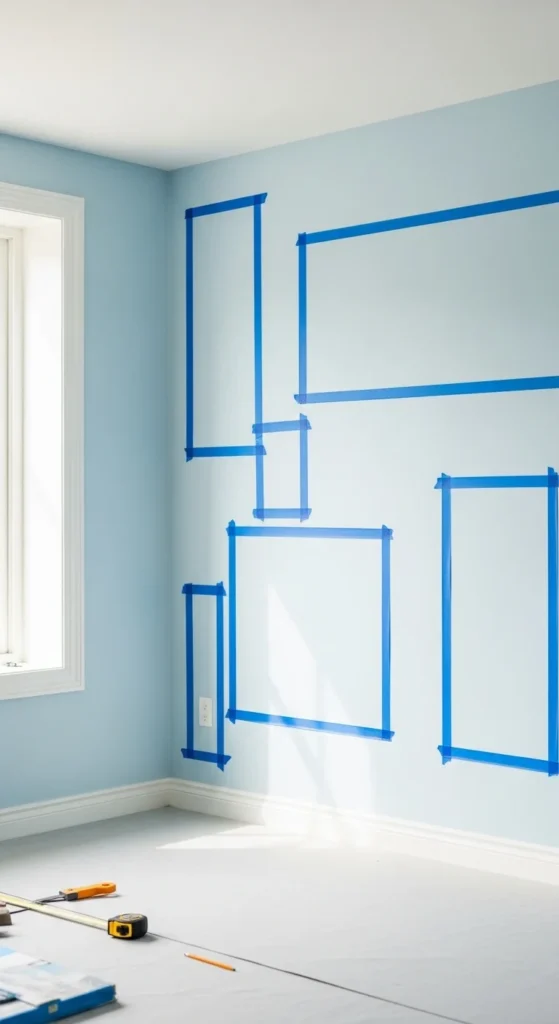
Choose the Right Height and Placement
Your molding placement affects how tall and elegant the room feels. A few inches higher or lower can change everything.
Here’s a quick guide:
- Wainscoting height: Around ⅓ of the wall height
- Chair rail: Roughly 32–36 inches off the floor
- Picture frame molding: Centered based on wall size; use symmetrical spacing
- Crown molding: Sits at the top, adding grand architectural detail
Use painter’s tape to map out shapes before committing. This helps you visualize proportions and adjust spacing without mistakes.
Select the Best Trim Material
Your trim material should match your budget, skill level, and desired finish.
Most common options:
- MDF trim: Affordable, smooth, and great for painting.
- Wood trim: Durable, natural, and perfect if you want stained molding.
- PVC trim: Moisture-resistant—ideal for bathrooms or laundry rooms.
- Polyurethane trim: Lightweight and good for intricate designs.
For most DIYers, MDF or polyurethane trims are easiest to work with, especially for painted molding.
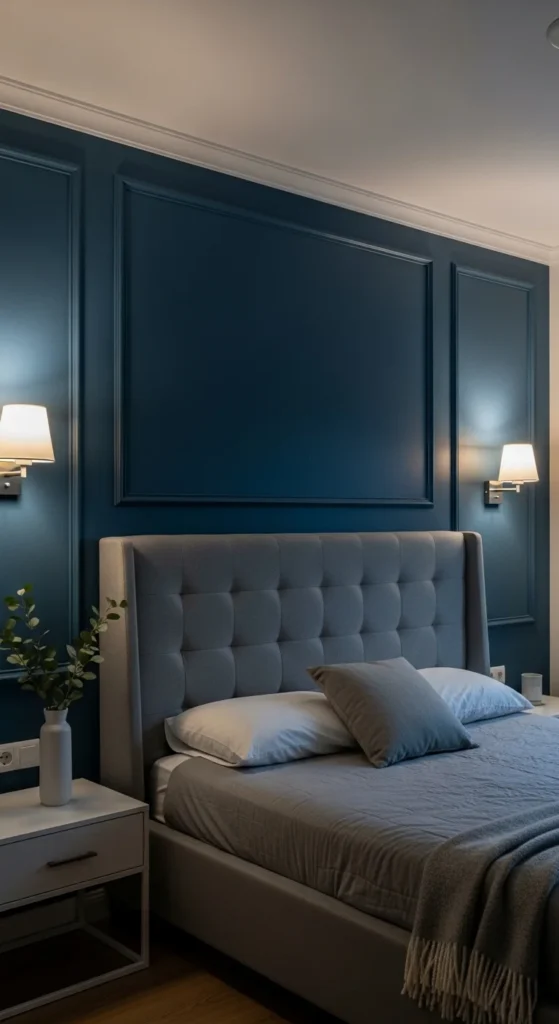
Keep the Color Palette Elegant and Simple
While molding looks stunning in classic white, don’t be afraid to try bold colors for a modern twist.
Elegant color options:
- Pure white for timeless sophistication
- Soft beige or greige for subtle luxury
- Navy blue for dramatic elegance
- Deep green for a rich vintage feel
- Black for bold, modern contrast
Painting the molding and the wall the same color creates a cohesive, high-end look.
Use Quality Paint for a Flawless Finish
Even the most beautifully installed molding can look unfinished without the right paint.
Choose:
- Satin or semi-gloss for a refined sheen
- High-quality primer to smooth the surface
- Durable paint that resists scuffs and fingerprints
If you want extra elegance, consider painting the entire room (including trim and doors) in one monochromatic shade.
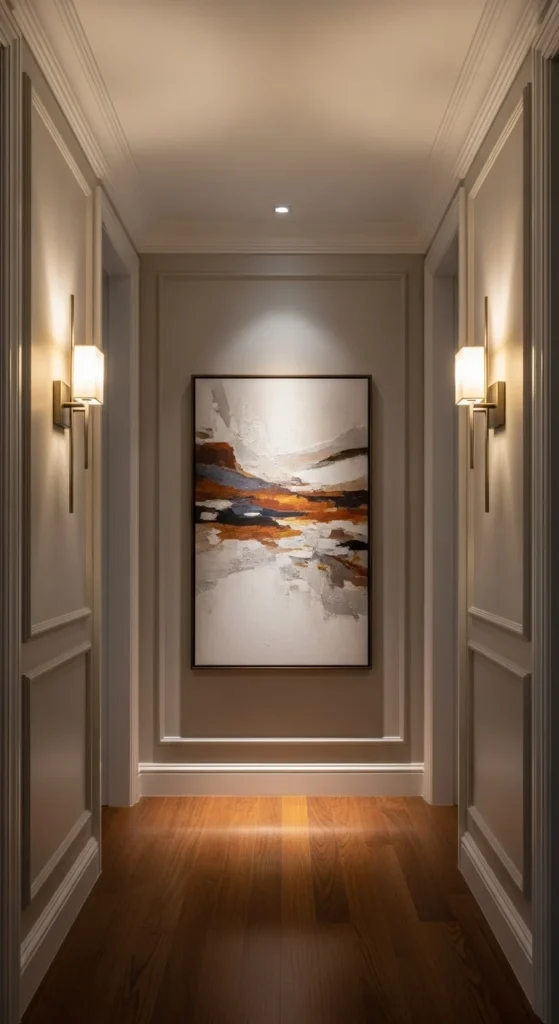
Add Molding to More Than Just Walls
Don’t forget that molding can upgrade other areas, too.
Try adding it to:
- Ceilings
- Doors
- Hallways
- Kitchen islands
- Closet doors
- Headboard walls
This creates continuity throughout your home and builds a more luxurious, custom look.
Layer Your Molding for Extra Depth
If you want a truly elegant finish, consider layering multiple molding types together.
For example:
- Crown molding + picture frame molding
- Chair rail + wainscoting
- Baseboard + tall vertical trims
Layering creates dimension and makes your space feel custom-built rather than plain.
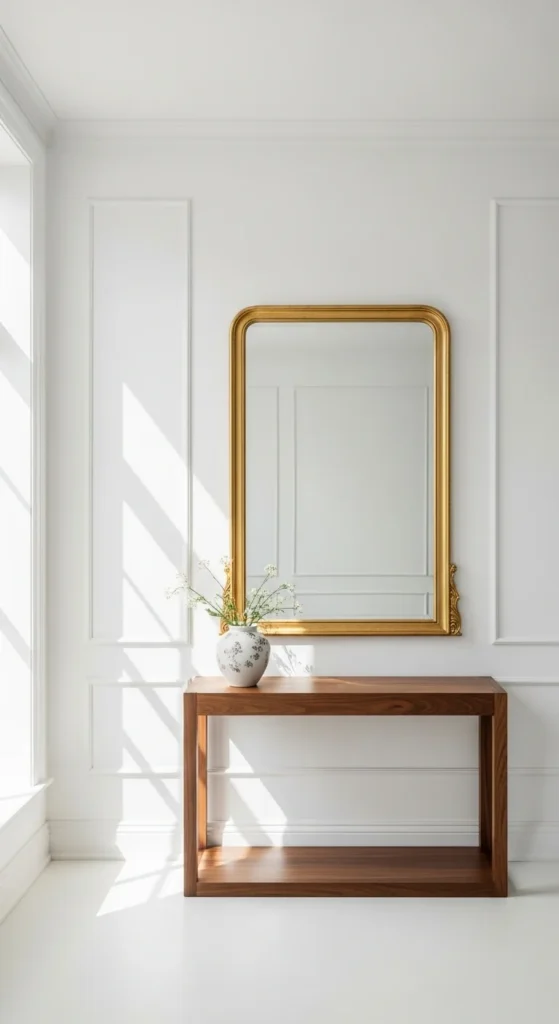
Style the Wall Thoughtfully After Installation
Your new molding doesn’t need heavy décor. Keep it simple so the architectural detail stands out.
Great styling ideas:
- A single large art piece
- A statement mirror
- Slim picture ledges
- Two symmetrical sconces
- Minimal wall décor for a gallery-like feel
Avoid clutter—molding already adds visual richness.
Don’t Be Afraid of DIY—It’s Easier Than You Think
While molding looks luxurious, it’s surprisingly beginner-friendly.
You’ll need:
- A miter saw (manual or electric)
- Measuring tape
- Level
- Wood glue or construction adhesive
- Finishing nails
- Caulk
- Paint
Once you get the hang of cutting angles, the rest is just measuring, leveling, and securing the pieces. Caulking and painting make everything look crisp and professional.
✅ Takeaway
Adding wall molding is one of the most affordable ways to bring instant elegance into your home. With the right style, proportions, materials, and paint, you can transform blank walls into beautiful architectural features that feel custom and high-end.

Leave a Reply