
Decorating your walls doesn’t have to cost a fortune to look high-end. In fact, some of the most stunning art you’ve seen online or in designer homes can easily be recreated with a few supplies, creativity, and a touch of patience. The secret? Simple materials + intentional design.
Whether you love clean minimalism, bold color splashes, or textured neutrals, these easy DIY wall art ideas will help you make your home look curated and expensive—without the hefty price tag.
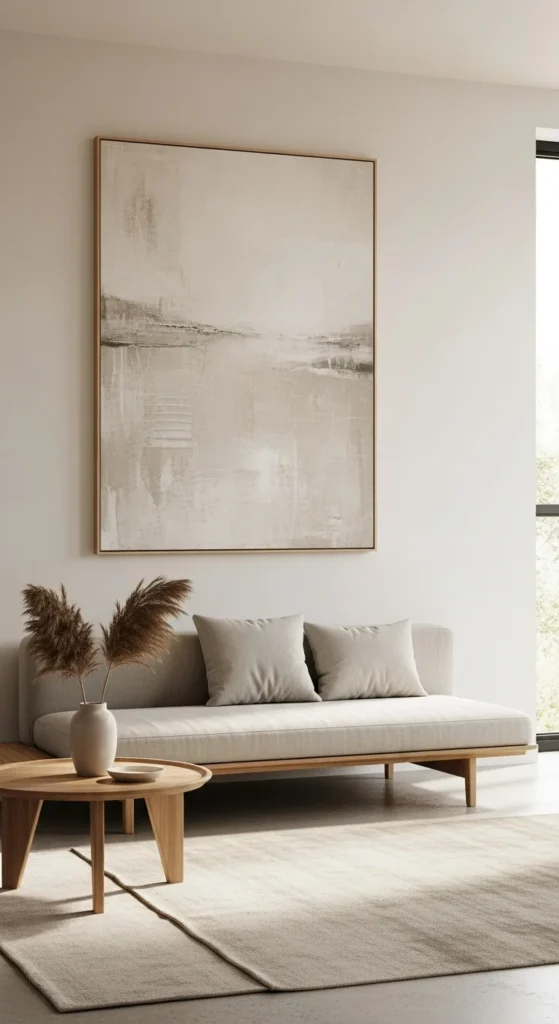
1. Start with a Statement Canvas
Every great wall art project begins with the right foundation—a canvas or surface that sets the tone for your piece.
Here’s how to start smart:
- Choose a large canvas (bigger pieces make a stronger impact).
- If you don’t have one, use foam boards or thrifted art—you can paint right over them.
- Keep your background color simple: white, beige, or a soft neutral works best.
Tip: Bigger is better when it comes to creating an upscale look. Even simple art looks elevated when it takes up wall space.
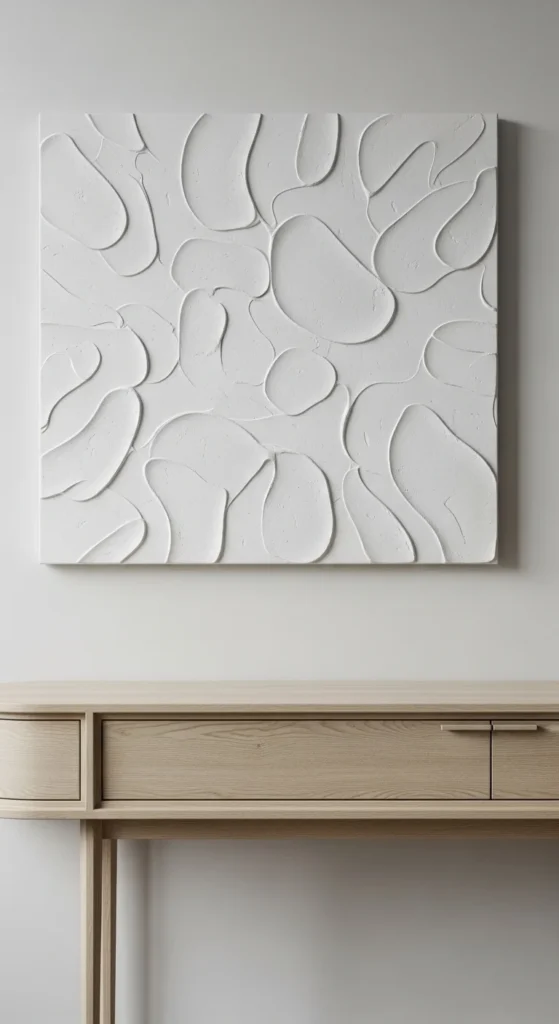
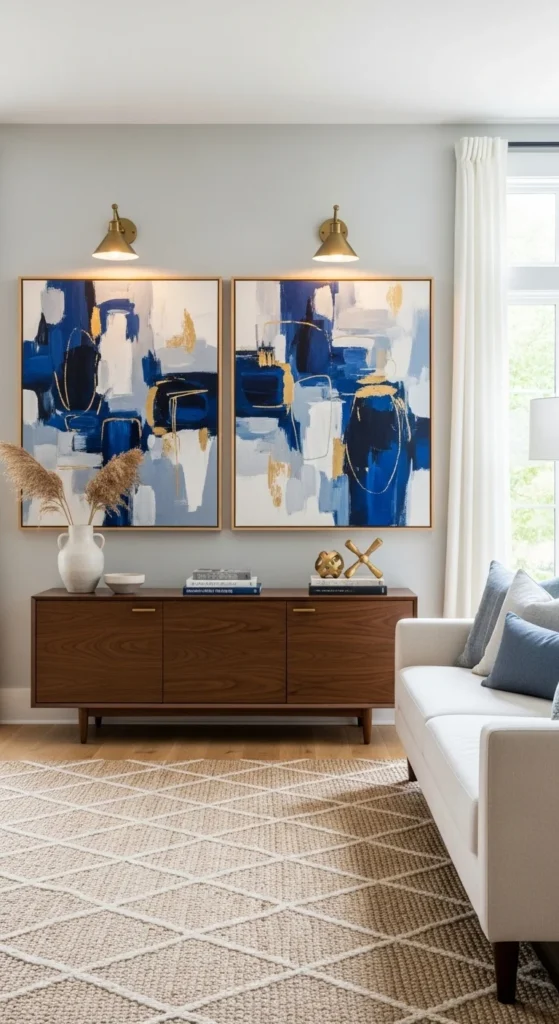
2. Go Abstract for Effortless Style
Abstract art is your best friend when you want that designer vibe without needing advanced painting skills. The beauty of abstract art lies in imperfection—it’s all about movement, contrast, and balance.
Try these ideas:
- Use a palette knife to spread paint in sweeping layers.
- Stick to three main colors—a base, a mid-tone, and an accent.
- Mix matte and metallic paints for a subtle luxe finish.
If you’re not confident with freeform painting, look up abstract composition references for inspiration—then make them your own.
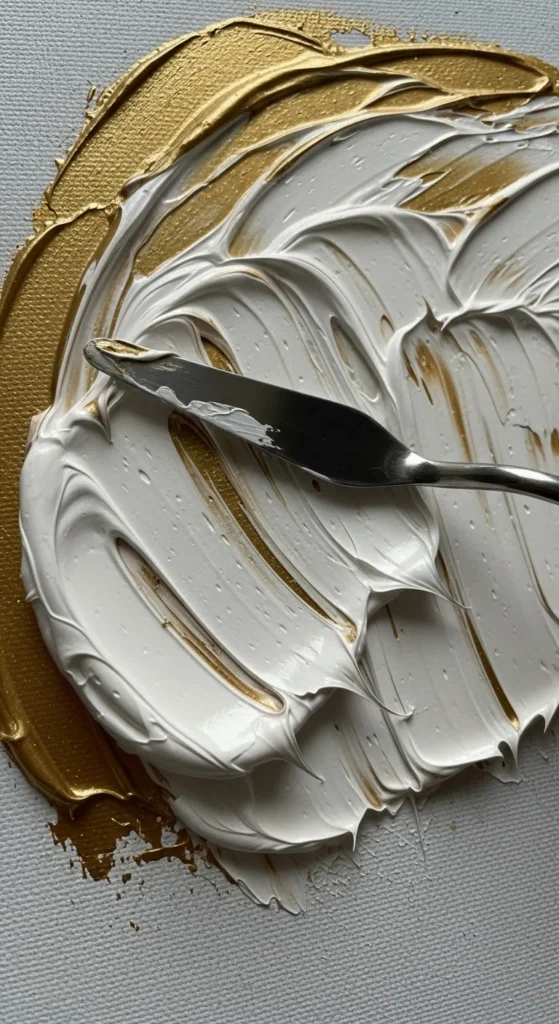
3. Add Texture Like a Pro
Nothing says “expensive” quite like texture. It gives depth, catches light, and instantly makes a piece look high-quality.
Here’s how to create texture easily:
- Use joint compound or modeling paste to add raised areas on your canvas.
- Apply it with a putty knife or old credit card.
- Once dry, paint over it with a neutral tone or metallic accent.
You can also add interest with materials like sand, baking soda (mixed with paint), or fabric scraps pressed into the paste for organic dimension.
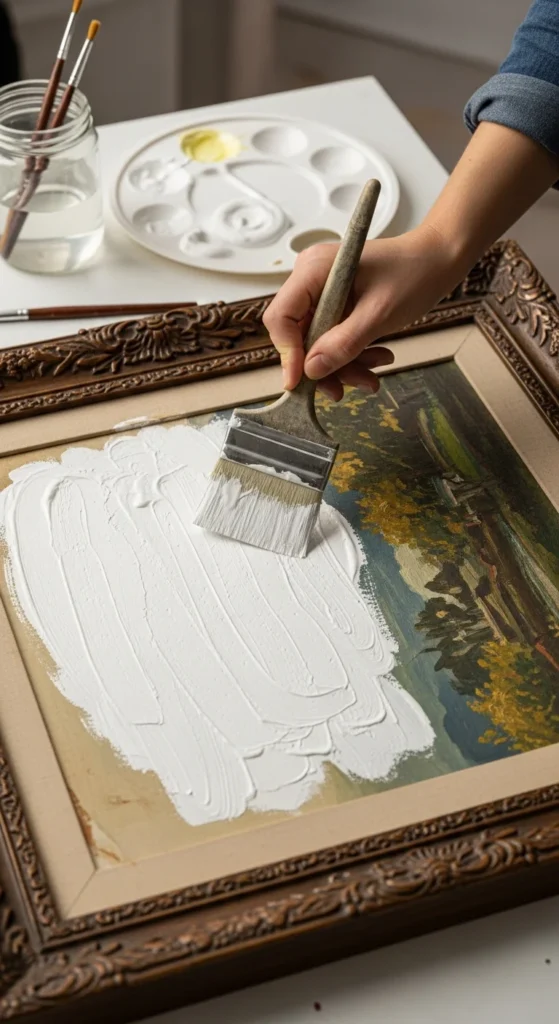
4. Frame It Like Fine Art
Even the most basic DIY painting can look gallery-worthy with the right frame. Presentation makes all the difference.
Choose frames that complement your decor:
- Thin black or gold metal frames for a modern look.
- Natural wood for a warm, organic vibe.
- Floating frames to make the art appear elevated and professional.
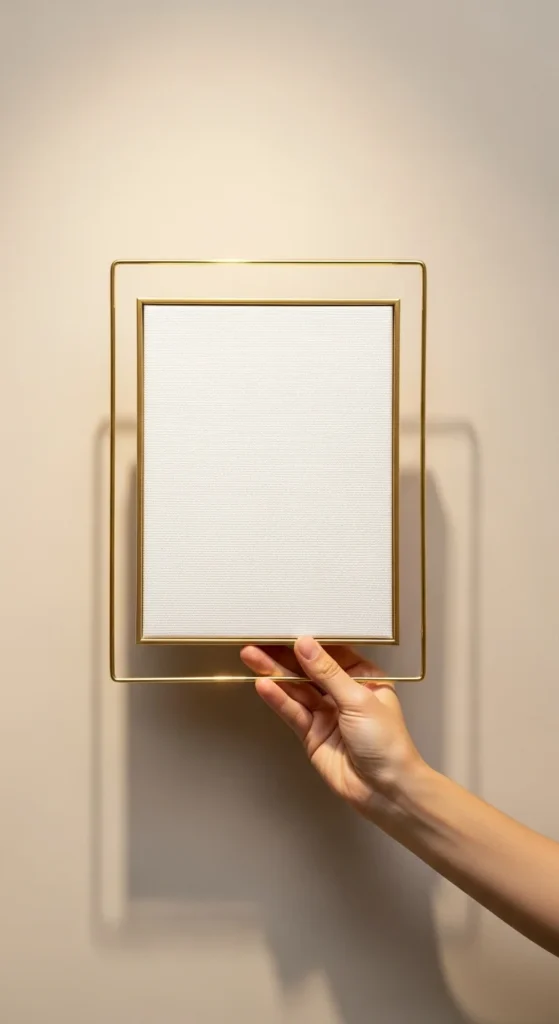
You can find affordable frames at IKEA, thrift stores, or even dollar shops—just give them a quick spray paint makeover to match your aesthetic.
5. Use Everyday Items as Art
You don’t need to be a painter to create stunning wall art. Many designer-inspired pieces use found objects or simple compositions.
Try these clever ideas:
- Frame fabric or wallpaper samples in coordinating colors.
- Use pressed leaves or flowers for a natural gallery wall.
- Arrange paint swatches or textured paper in a grid for a modern art display.
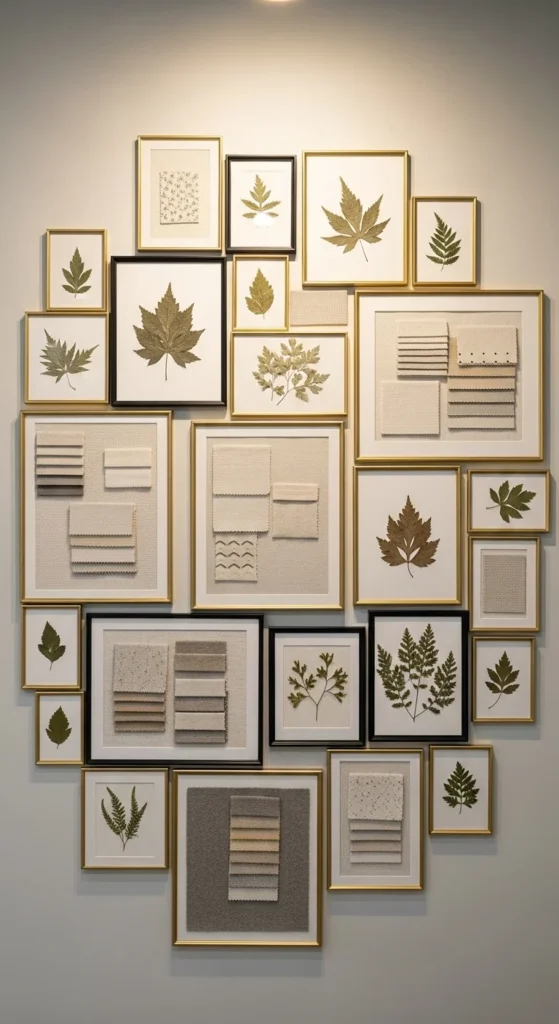
Minimal, structured designs often look more high-end than overly detailed ones. Think clean lines, soft tones, and balanced spacing.
6. Stick to a Cohesive Color Palette
When creating multiple pieces or a gallery wall, a unified palette keeps everything looking expensive and curated.
Some timeless color combinations include:
- White, beige, and gold (chic and warm).
- Black, gray, and cream (modern and bold).
- Taupe, blush, and metallic copper (soft and romantic).
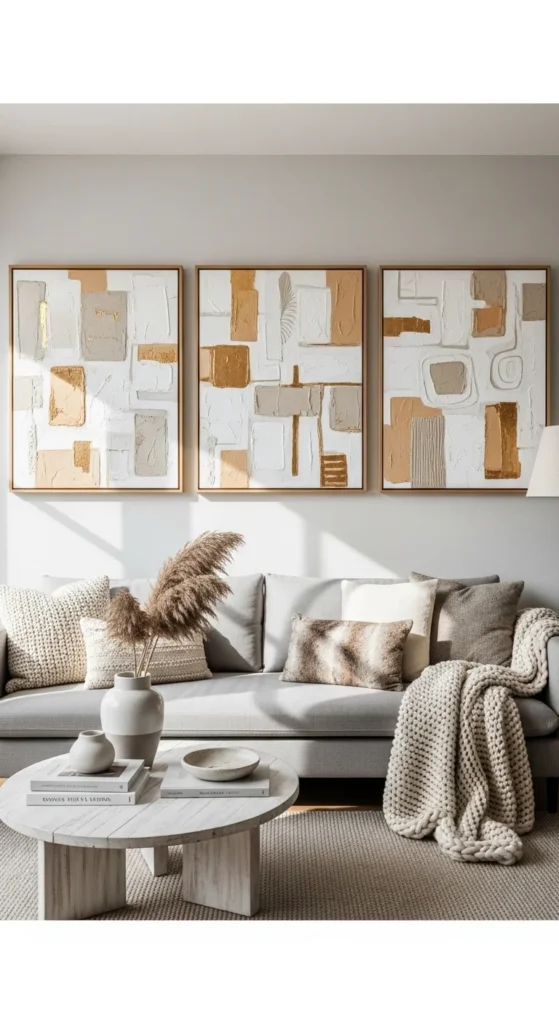
Keep colors consistent across your artwork and surrounding decor—like pillows, rugs, or vases—for a designer-level finish.
7. Display It Thoughtfully
Even the most stunning art loses its magic if it’s not hung properly. To give your DIY masterpiece that professional feel:
- Hang artwork at eye level (about 57 inches from the floor to the center of the piece).
- If creating a gallery wall, plan the layout on the floor first.
- Space pieces about 2–3 inches apart for breathing room.
Lighting also matters. Use accent lighting or wall sconces to highlight your art and create shadows that bring the texture to life.
Final Thoughts
Creating DIY wall art that looks expensive isn’t about the price tag—it’s about creativity, confidence, and thoughtful details. By layering textures, choosing cohesive colors, and framing your pieces beautifully, you can achieve that high-end look right at home.
So grab your paint, brushes, and a bit of imagination—and turn your blank walls into your own personal gallery.
Leave a Reply